You arrive home from work and notice that at your door is your brand-new Aurora LED light bar that you ordered from Off Brand. You open the box and pull out the wiring harness and are now perplexed because you never installed a light bar before. Don’t worry we will walk you through the basic steps to getting this LED light bar installed. In-depth electronics knowledge is not necessarily needed as the Aurora Wiring harness comes pre-assembled making the installation easier. However, professional installed is recommended so you don’t damage the light bar.
Tools Needed for light bar installation:
- Ratchet with sockets
- Basic Screwdrivers
- Pliers
- Wire Strippers (Optional)
- Wire terminals (Optional)
- Drill and Drill bits
- Measuring Tape
- Marker or device to mark drilling location
- Wire ties (Optional)
- Wire loom (Optional)
Location, Location, Location
Get a nice and clean work-space set-up so you can begin the installation of your LED light bar. Also make sure your vehicle is on a flat leveled service as this will make aiming the light bar beam easier.The opening
- LED Light Bar
- Wiring Harness
- LED Light Bar mounts
- Warranty Cards
- Off Brand Card with discount code for your next purchase
Light Bar Placement
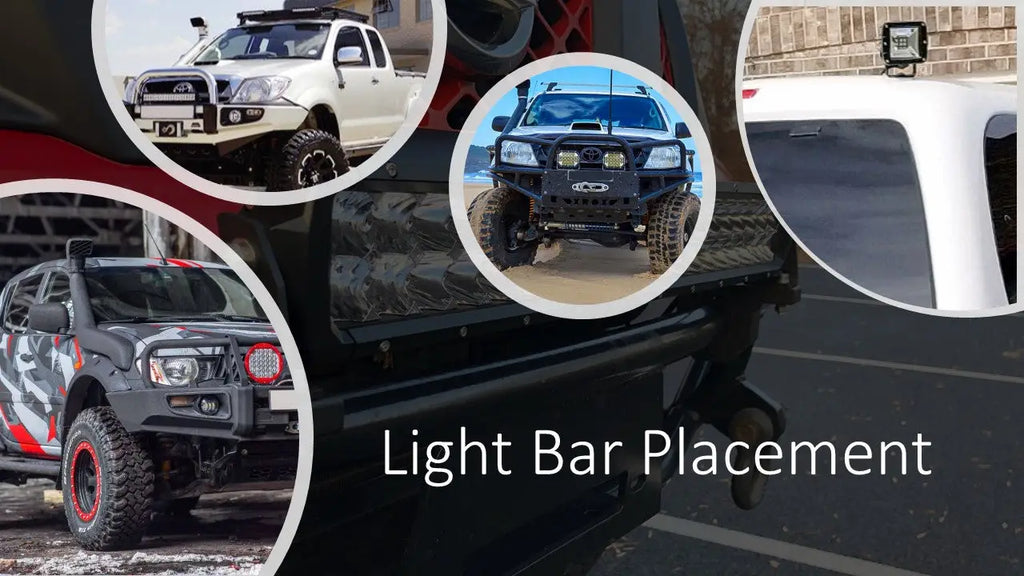
- When determining a mounting location make sure their will be no clearance issues.
- If this will be a roof mounted LED light bar it is critical that you understand your vehicles new overall height. You don’t want to have your new Aurora light bar coming face to face with the overhang at your local McDonald's drive thru.
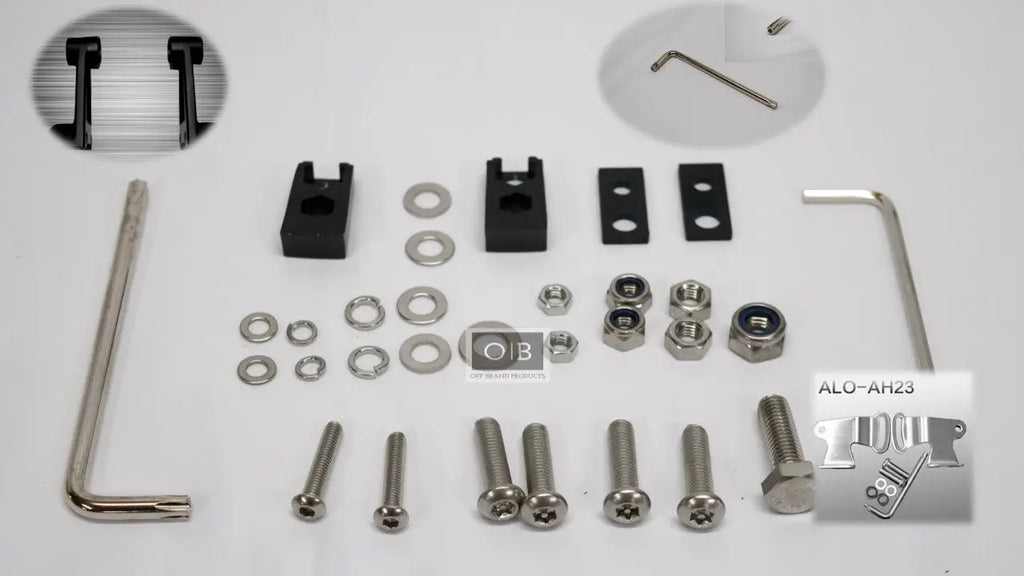
Get it on
With your mounting location determine, attach the light bar mounts to the light bar and install on the vehicle.
- Aurora LED light bars are equipped with lock nuts, so you do not need to over tighten the mounting bolts.
Plot your course
With your light bar mounted you will need to figure out how you will run the wires to power your light bar.
- Do not attach light bar wiring to anything that moves or place the wire next to anything that moves. A good example is your steering wheel shaft, stay clear of it.
- Make sure any 12-volt power wire is secured to your vehicle to prevent the wire from rubbing against any metal surface which will create an electrical short. If you think there will be chance of the wire moving or rubbing against a metal surface, then simply wrap the light bar wire with wire loom. Wire loom is inexpensive and will save you from a bigger headache in the long run.
- Tips for plotting your course
- Stay clear of moving parts.
- Know and understand where you will be mounting the switch
- How will power get from engine bay to interior of vehicle.
- Do not extend the light bars wires unless you obsoletely need to.
Let’s get together
Connect your Aurora LED light bar to the wiring harness using the supplied Deutsch connectors. Secure any excess wires to your vehicle to prevent the wire being snagged on a tree branch or other objects your vehicle may come in contact with.
It’s not going anywhere
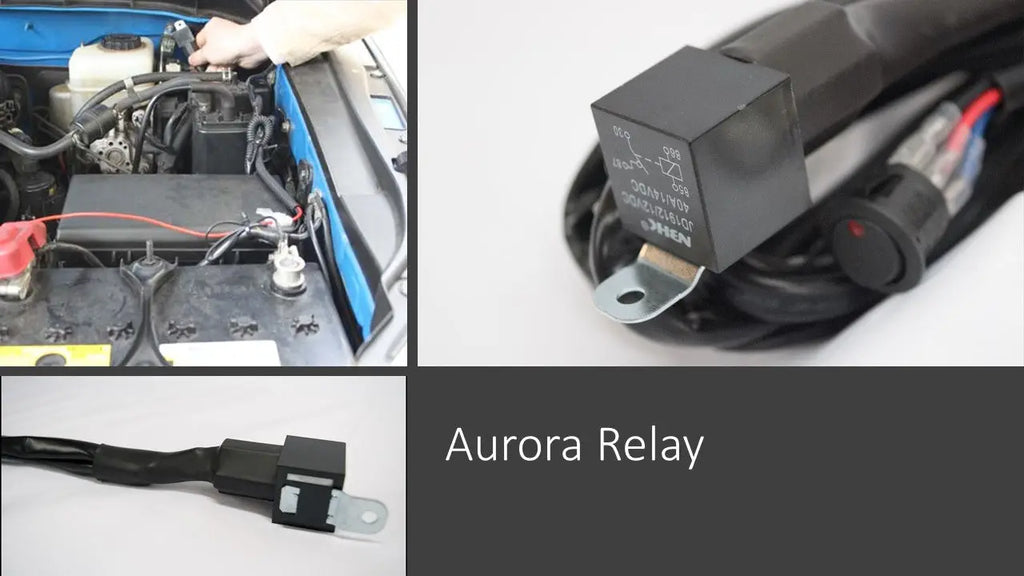
The Aurora light bar relay is water resistant so you can mount it in the engine bay where water contact will be minimal. The Aurora light bar relay is equipped with a mount to make installation easier.
Drill baby drill
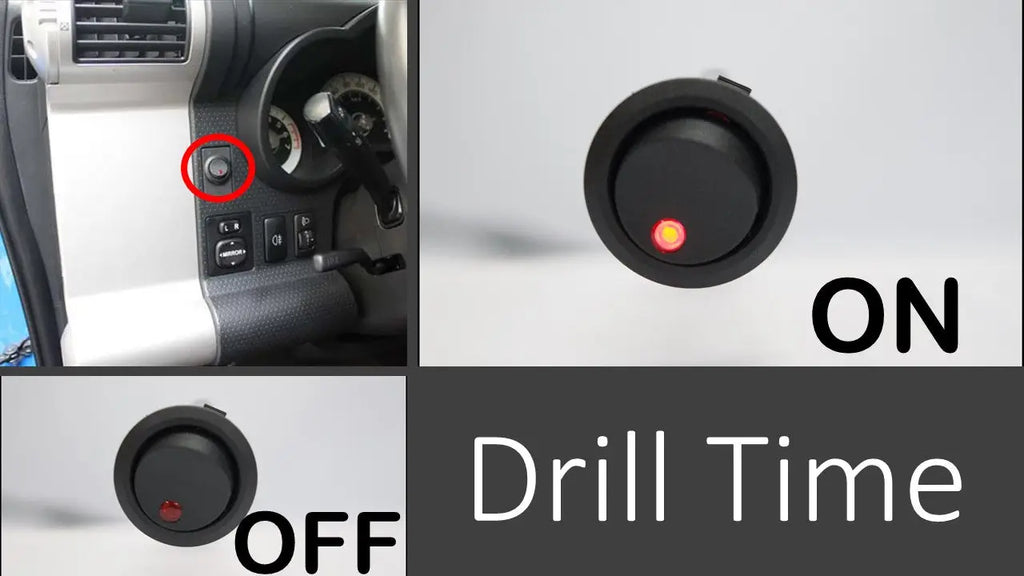
Drill a hole in the location where you want the light bar switch will be housed. Make sure that this light bar switch location is easily accessible to you while driving.
- When drilling a hole for your light bar switch, start with a small drill bit and then move to a larger drill bit.
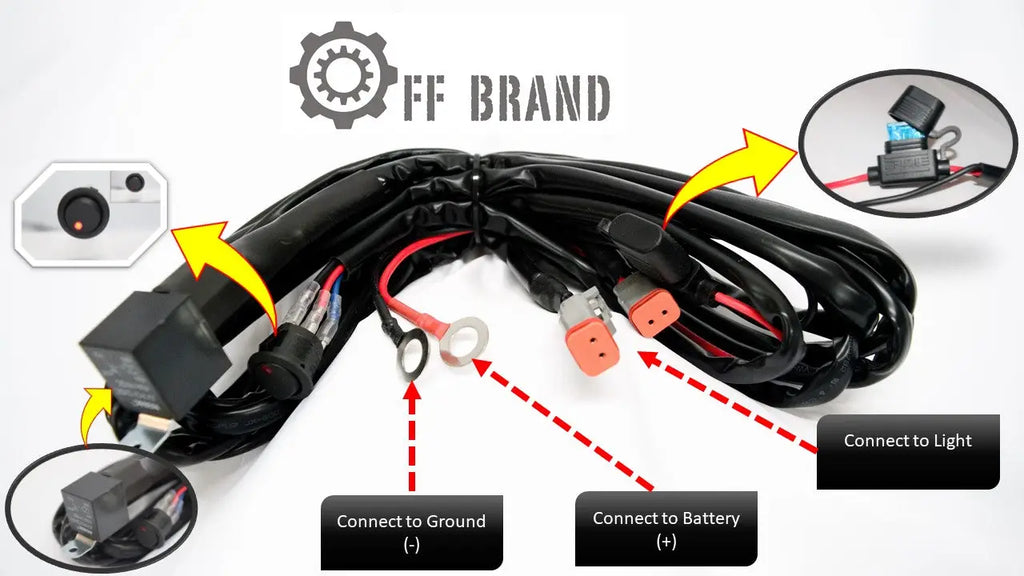
I got the power

Connect the power and ground wires from the Aurora light bar wiring harness to your vehicle’s battery.
- Connect the positive wire first and then the ground/negative wire.
- When tightening the positive battery cables and wires make sure your tightening device not come in contact with any metal or ground surfaces on your vehicle as this will cause damage to you and or your vehicle.
- Make sure there is no corrosion on battery as this will affect the power that goes to the light bar.
Blinded by the Light
DO NOT look directly into the light bar as these are not cheap light bars and can cause serious eye damage. Instead look around the light bar when checking for functionality.
Let there be light
Hit the switch and be amazed by the power of Aurora LED lights.
X marks the spot
To make sure that you are getting the most out of your light bar you should park the vehicle on a level surface and face the vehicle towards a building or wall. Switch the light bar on and make sure the light beam is shining in the direction that you want
Sun’s down let the adventure begin
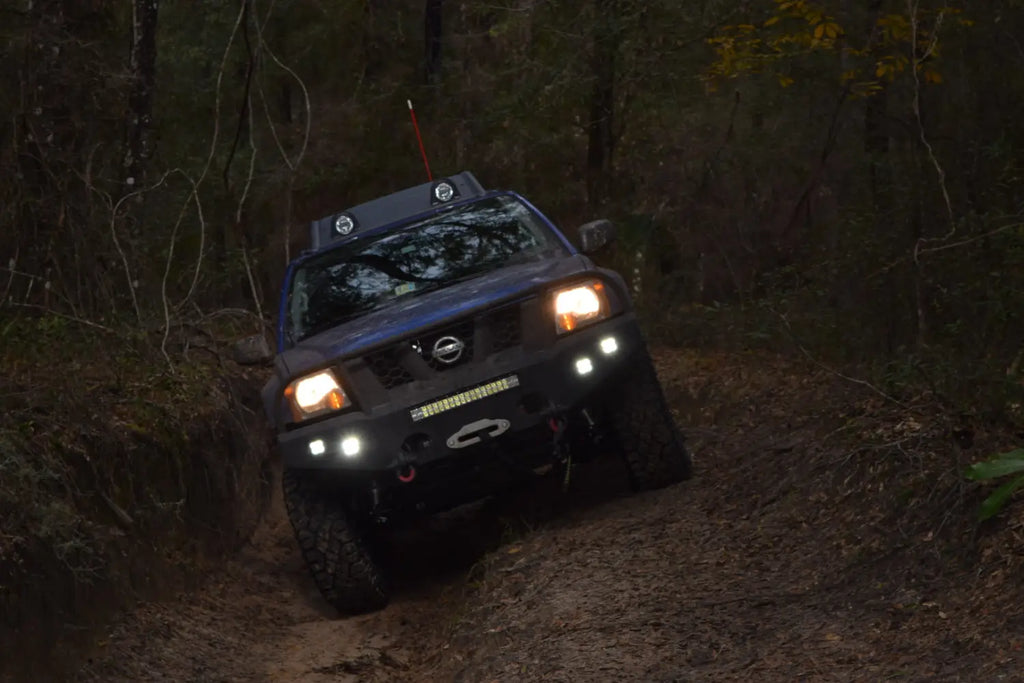
With your new Aurora light bar installed take the vehicle on a trail or dark back road and make sure the light is still aimed correctly.
If you are still having issues then feel free to reach out to our support team at support@offbrandporducts.com. Or give us a call at (484)-513-7746