
Wiring a light bar switch can seem like an intimidating task but it’s actually quite the opposite and you can have all the wiring done under 5 minutes. The most challenging part of the installation process can be understanding where all the different wires go but don’t worry as we will walk you through the process.
Understanding the light bar switch
A 5 pin light bar rocker switch is one of the most popular light bar switches because it is rectangle in shape, and typically blends with most vehicles interior’s. The rocker switch operates a light bar by pushing the top portion of the switch and to turn the light bar switch off you simply push it the lower part of the switch.
Another reason why the 5 Pin rocker switch is popular for light bars is because they have an illuminated light that can work with your factory interior dash lighting. When the light bar switch is on another light will be illuminated on the light bar rocker switch notifying you that the switch is currently powering whichever light bar you have connected to it.
It’s the law
When it comes to installing aftermarket auxiliary lighting on your vehicle you need to cognizant of your state’s laws. For example, here in the state of Pennsylvania you are required to have light bar switch that illuminates when the light is on. The purpose of this law is they want to make sure the driver knows when the auxiliary light bar is on, so you don’t blind on coming traffic.
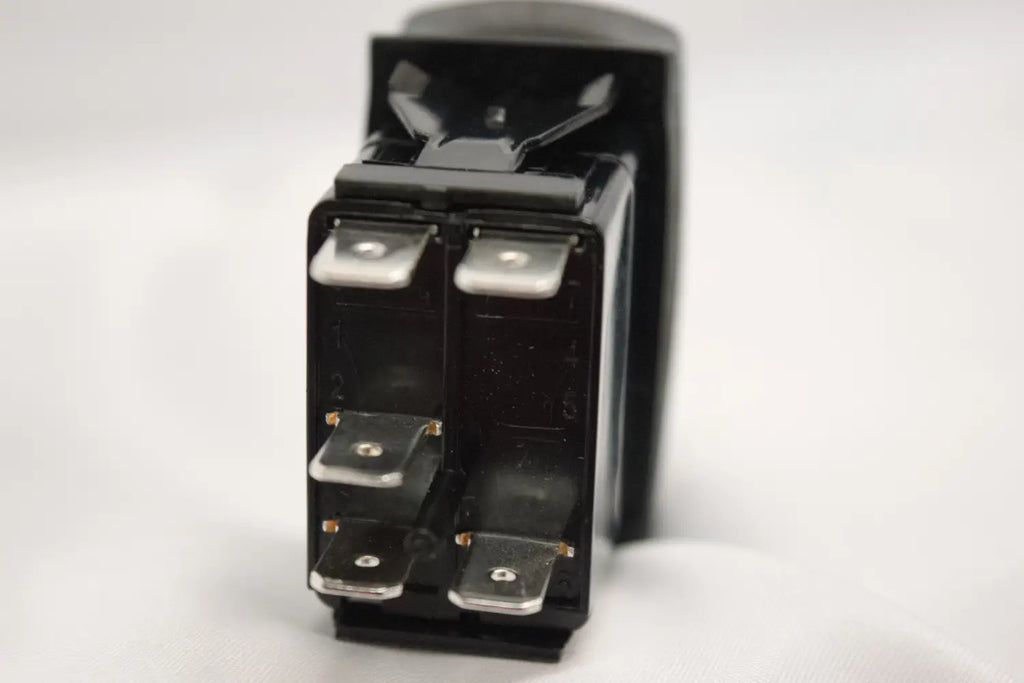
Lets check out the back
On the back of a 5-pin light bar rocker switch is 5 pins that all have specific purposes.
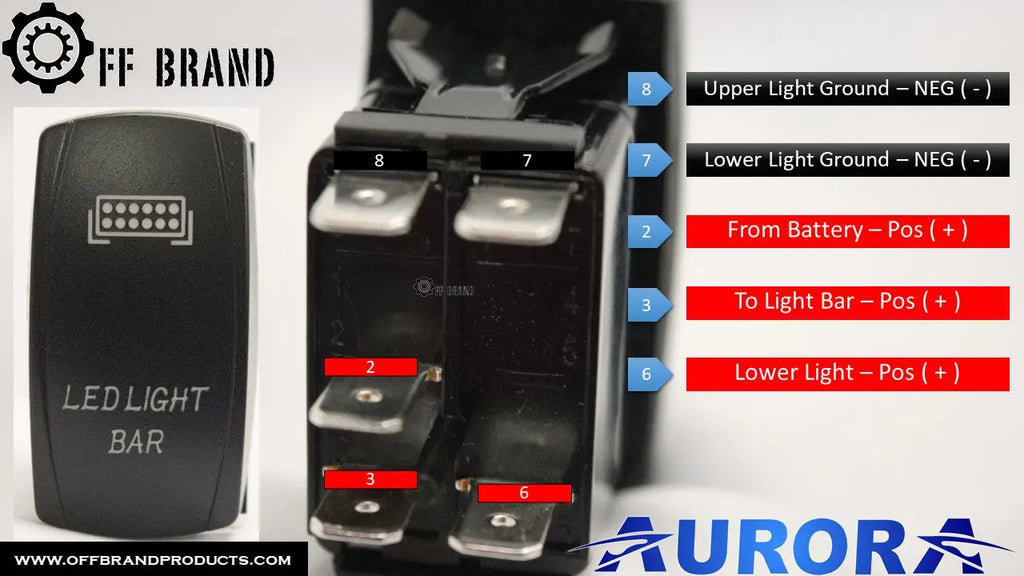
The switch is standing upright so we will start from the top to the bottom:
- #8 Is the Ground for the switches upper light – (This terminal can be grounded together with #7)
- -#7 Is the Ground for the switches lower light - (This terminal can be grounded together with #8, except in the occasions that you are wiring the switch lights with your vehicles factory light dimmer)
- #2 Is the Positive power from the battery or Power source that has a fuse (This terminal can be combined with #6)
- #3 Is the Positive power that goes to the light bar (This is the only terminal that cannot be combined with another terminal)
- #6 Is the Positive power that goes to the lower light (This terminal can be combined with #2)
How to make the light bar Jumper Cables
You will need to make two jumper cables:

Ground Jumper Cables – These will be foe the ground for #8 Ground for the upper light, #7 Ground for lower light
Positive Jumper Cables – This will be for #2 Incoming Power source, and #6 Power for the lower light
Once that is complete, run the rest of the light bar wiring and you are good to go.
If you are trying to convert a 3 pin light bar switch to a 5 pin rocker switch, then please read below.
To wire a 3 pin switch to a 5 Pin rocker switch you need to find out what your 3 wires do. Aurora wiring harnesses are set-up as black = ground/negative, red = positive, blue = power to lighting product. If you are using any other wiring harness you will need to test each wire to find out which wire represents power, ground and power to the LED lighting product.